Building a low-cost high-performance home NAS
Posted on Nov 17, 2009 by HappyBison
Software Installation
I usually install the software after the system is built, but in the case of MSI Fuzzy motherboard GME965 it's a little tricky. The motherboard has CF slot on the opposite side so I have to prepare my CF card with OS and insert it into the board before putting the board into my case (there is a way to install FreeNAS after system is built, but I found it will be easier to install it on another PC using a regular USB CF Card reader).
Here is how to do it using any modern Windows-based machine:
- Connect your USB CF Card reader with CF into your PC.
Download FreeNAS. You need Embedded version. If your system has 4GB of RAM and 64-bit CPU (any Intel Core2 Duo), then you better get Embedded AMD64 version. If not, then get Embedded i386. As of time of writing, FreeNAS is at version 0.7 so you should end up with a file FreeNAS-amd64-embedded-0.7.4919.img (or whatever version or type you chose).
Download physdiskwrite utility. This utility can write your img file onto your CF card. You have to run it from command prompt:
physdiskwrite FreeNAS-amd64-embedded-0.7.4919.img You should get a list of disk drives you have in the system (including your CF card). If you don't get a list, then make sure you are running it as Administrator (starting command prompt as Administrator should help). After a successfull write your CF is ready.
Note: You may also use a USB Flash drive instead of internal CF card. It's good for experimenting, but I would not recommend it for the long run because it's easy to break when you have your USB Flash drive sticking out your case.
Building
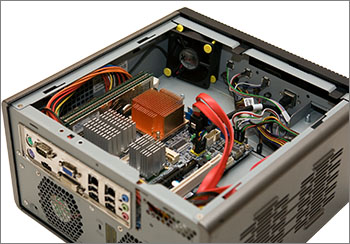
 The build process is easy if you are familiar with building desktop PCs. I usually start with putting a motherboard into a case first. Then install the other components on the board (CPU, RAM, cards, etc), then connect all cables to it.
The Chenbro ES34069 case I'm using helps a lot for easier installation: hard drives are getting installed in different section (mounted on the special removale brackets), while motherboard is open for easier components and cables installation.
I always try to hide and move away all cables to get the best airflow (SATA cables helps a lot compared to old PATA ones).
The better airflow you do, the more stable system you get in the long run. Any component don't like to be overheat so you may need to watch for temperatures to make sure it's all "cool".