ESP32-C3: welcome to the ESP32 family
Posted on Feb 11, 2021 by HappyBison
Intro

Espressif announced a new SoC some time in November of 2020. The chip is called ESP32-C3. I happen to get an engineering sample and I'm happy to share my thoughts on this.
My post will be more towards DIY-community due to my own background. TLDR: I'm really excited about the new addition to ESP32 family and the new features it brings.
ESP32-C3 vs others
The ESP32-C3 is suppose to take a place somewhere between ESP32/ESP32-S and our old friend ESP8266.
I won't be surprised if the goal is to replace ESP8266 and to take its place in most of the projects. After all, ESP8266 served us well since 2014 and there is a time for a change while keeping those small projects alive. I think it will be a matter of the price of the final product and boards based on it.
Here is the quick table of the differences I was able to find between those 3 chips based on the PDF documents from Espressif:
|
ESP32 |
ESP32-S2 |
ESP32-C3 |
CPU Core |
Xtensa LX6 |
Xtensa LX7 |
RISC-V (RV32IMC) |
Freq |
160/240MHz |
160/240MHz |
160MHz |
ULP CPU |
ULP-SFM |
ULP-RISC-V & ULP-FSM |
- |
SRAM |
520KB |
320KB |
400KB |
RTC SRAM |
16KB |
8KB |
8KB |
WiFi |
802.11bgn |
802.11bgn, 802.11mc |
802.11bgn, 802.11mc |
Bluetooth |
4.2 BR/EDR BLE |
- |
Bluetooth 5 |
GPIO |
34 |
43 |
22 |
ADC |
1, 18 channels |
2, 20 channels |
2, 6 channels |
DAC |
2 |
2 |
- |
Touch sensor |
10 |
14 |
- |
SPI |
4 |
4 |
3 |
I2S |
2 |
1 |
1 |
I2C |
2 |
2 |
1 |
UART |
3 |
2 |
2 |
SDIO |
1 |
- |
- |
Ethernet MAC |
1 |
- |
- |
PWM |
16 |
8 |
6 |
USB OTG |
- |
1 |
- |
Power, full load |
240mA |
310mA |
325mA |
Modem sleep |
27-68mA |
12-19mA |
15-20mA |
Light sleep |
0.8mA |
0.45mA |
0.13mA |
Deep sleep |
10-150uA |
20-190uA |
5uA |
Package |
48 pins |
56 pins |
32 pins |
DevKit module

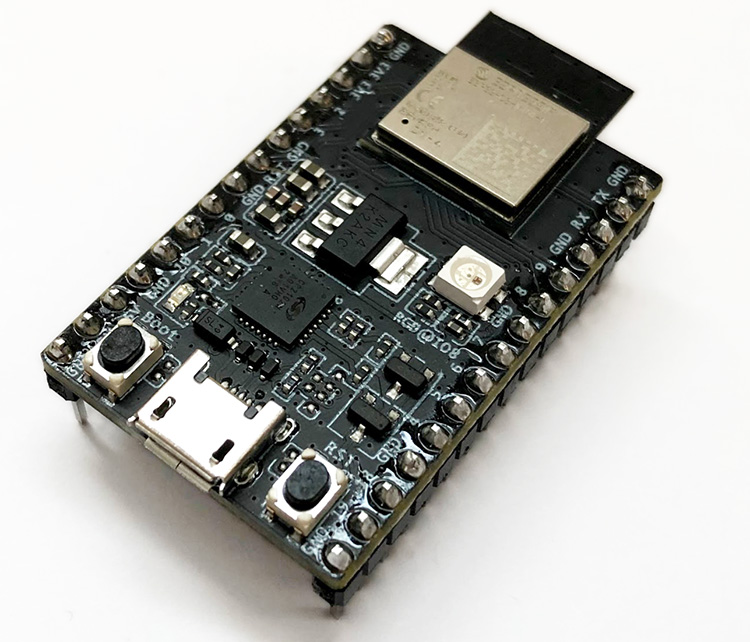
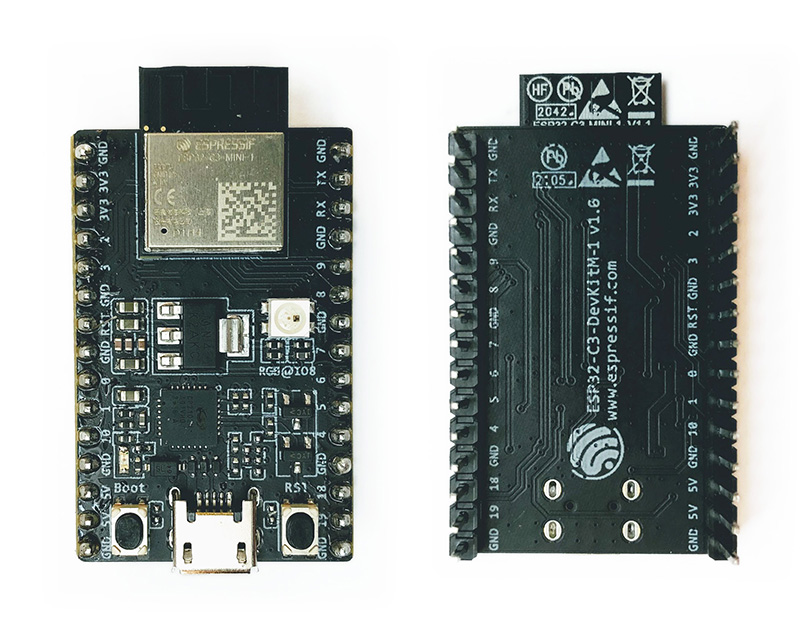
The sample of ESP32-C3 I received came mounted as the ESP32-C3-DevKitM-1 modules. It has ESP32-C3-Mini-1 soldered on with 4MB of Flash. It has CP2102 USB-UART converter and RGB WS2812 Led mounted.
The actual ESP32-C3-Mini-1 module looks smaller than the well known ES-12E with ESP8266. The smaller package comes with more power. More in less, way to go!
Engineering Sample Note

The shipment came with a Note from Espressif mentioning a few gotchas I should be aware of.
For example, it mentions the power consumption of the engineering sample has not been optimized and it may be higher than what's listed in the datasheet.
The USB Serial/JTAG functionality is not supported in the chip yet. But the mass production batch will have such functionality. Good news, I'm looking forward to it.
ESP-IDF Support
The current "master" branch has the support for ESP32-C3. Or you can pick "release/v4.3" branch too.
You may want to make sure you update your ESP-IDF if you cloned it from Git some time ago:
cd esp-idf
git checkout master
git pull
git submodule update --init --recursive
./install.sh
If you are starting from scratch, Espressif has a good manual on how to get thing going. It supports Linux, macOS and Windows.
https://docs.espressif.com/projects/esp-idf/en/latest/esp32/get-started/
Once everything is setup, all you need to do is to run this before building:
cd esp-idf
. ./export.sh
I would recommend to make a build of "hello world" to verify everything works for you:
cd esp-idf
cd examples/get-started/blink
idf.py set-target esp32c3
idf.py build flash monitor
CoreMark
I built and ran CoreMark benchmark on ESP32 and ESP32-C3 to compare the speed of different CPU cores. Unfortunately, I don't have ESP32-S2 to get a better idea. Anyway, the results look interesting.
|
CoreMark 1.0 |
GCC |
CPU Freq |
ESP32-C3 |
388 |
GCC8.4.0 -O3 |
160MHz |
|
98 |
GCC8.4.0 -O0 |
160MHz |
|
194 |
GCC8.4.0 -O3 |
80MHz |
|
49 |
GCC8.4.0 -O0 |
80MHz |
ESP32 (single core) |
313 |
GCC8.4.0 -O3 |
160MHz |
|
77 |
GCC8.4.0 -O0 |
160MHz |
|
469 |
GCC8.4.0 -O3 |
240MHz |
|
115 |
GCC8.4.0 -O0 |
240MHz |
At least, RISC-V compared to Xtensa LX6 appears to get about 24% boost in the favor of the newer RISC-V core.
Your normal tasks for this chip probably won't be that CPU extensive, but the more you do in less, the better and faster you can go back to sleep.
Don't forget as you can still boost ESP32 to 240MHz and get things done even faster, but I'm sure you have to pay for the etxra power consumption. So it all comes to your tasks and needs.
ESP RainMaker
Espressif is trying hard to push their own IoT framework called ESP RainMaker to simplify and speed up proof of concept development and making a quick start for a new product.
All you have to do is to configure and burn ESP RainMaker into ESP32, provision WiFi settings with your Android or iOS device and be online and controllable through local network or cloud in a moment.
You can configure ESP RainMaker for different tasks such as binary switch, LED brightness, fan control, GPIO or a compbination of those. And of course you can make your own thing to work under ESP RainMaker.
If you connect ESP32 to a console using USB, you will get a QR code which can be scanned by ESP RainMaker app on your device to get it provisioned automatically. The cloud control is done using Espressif cloud hosted by Amazon AWS.
You can build ESP RainMaker and flash it into any current ESP32 series chips:
git clone --recursive https://github.com/espressif/esp-rainmaker.git
cd esp-rainmaker/examples/switch

# By default it's set for ESP32, but if you need it to make it for ESP32-S2
idf.py set-target esp32s2
# Set it for ESP32-C3
idf.py set-target esp32c3

# Build, flash, get QR code
idf.py build flash monitor
Conclusions
There is not much conclusions besides that I liked the new chip in the ESP32 family and I hope it will be strong enough to replace our old ESP8266 friend, it's been doing well for the past 7 years.
The more choices for DIY-ers, the better. And thank you Espressif to make WiFi so affordable long time ago.